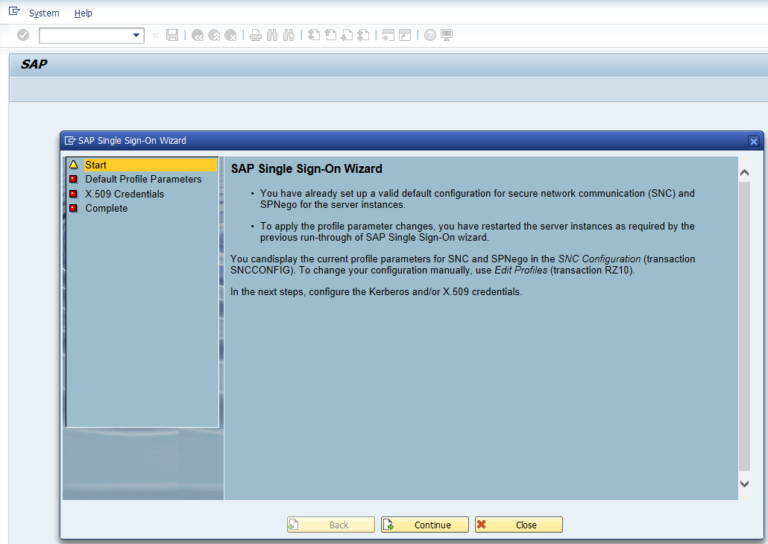
Run t-code SNCWIZARD, SAP Single Sign-On Wizard will start. Click continue
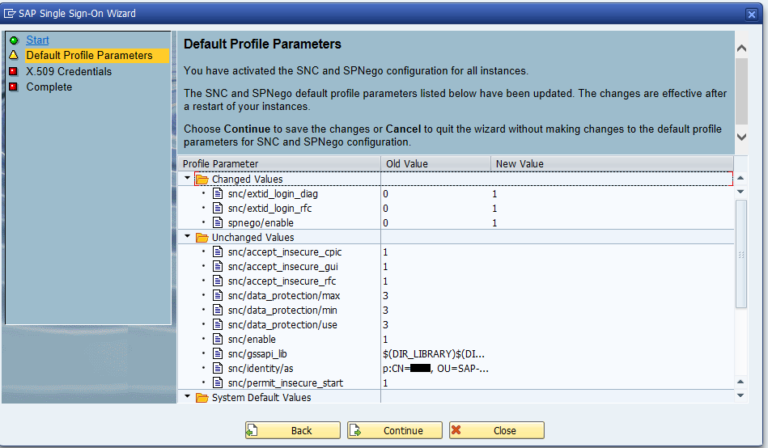
On Default Profile Parameters screen, the transaction will assign changed values by default. In this screen, click Continue.
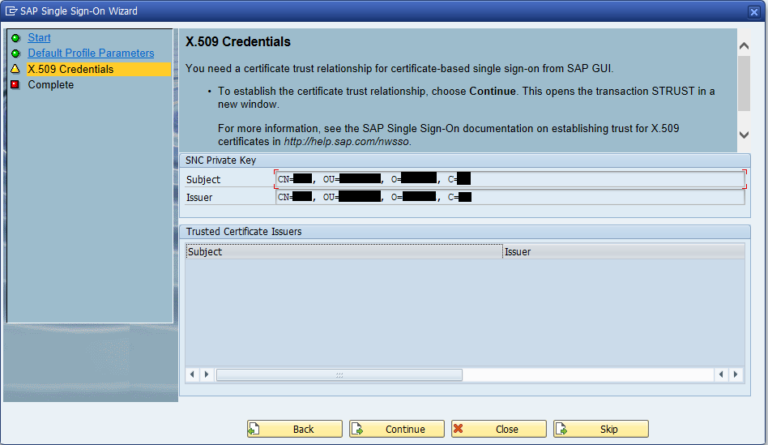
Next screen is X.509 Credentials, we will need to configure this in the next steps. For now, click Skip.
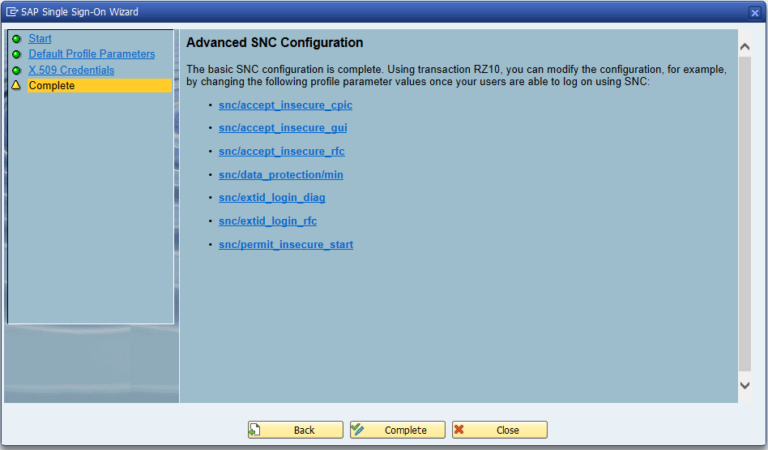
Click Complete.
Since we changed the configuration, the application server needs to be restarted. Request your basis team to schedule a restart for SAP application server.
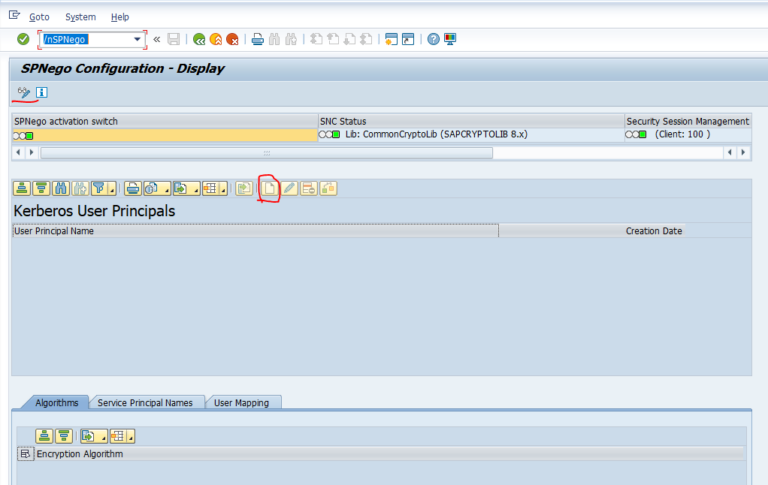
After the restart, run the t-code SPNego. Click edit, and click Add icon
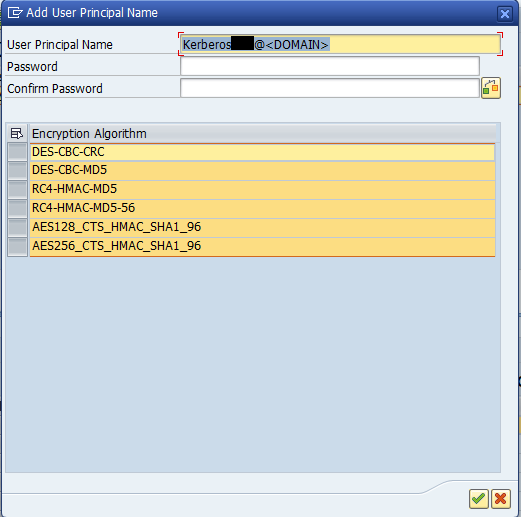
New screen will pop-up. Enter SAP Service Account information which is created step 1
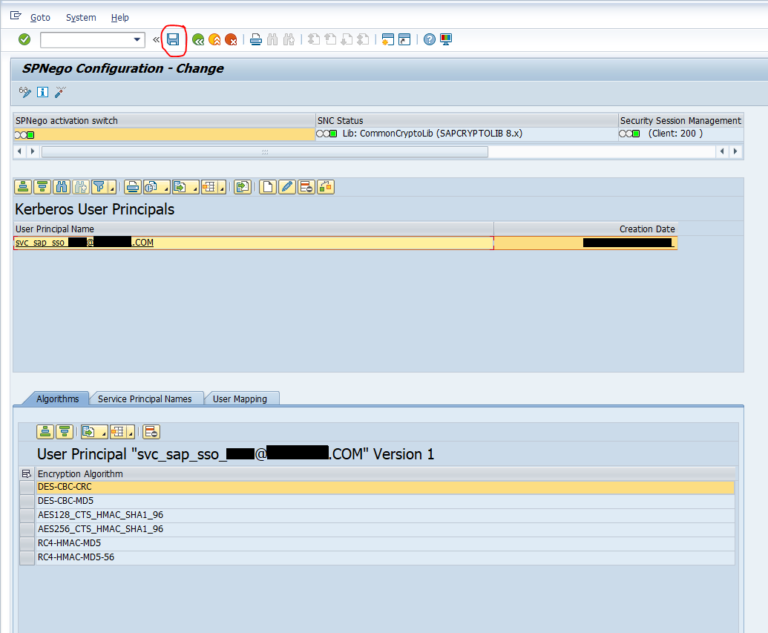
Click Continue (Enter) button and click the Save button at the top
That’s it. SAP Configuration is finished. Now, we need to install SAP Secure Login Client 3.0 to client PC.